How to Get the Perfect Self-Tan
Beyond looking sun-kissed without the damage, self-tanners can enliven dull skin, help camouflage imperfections, and even make cellulite less noticeable (Hello-o-o-o! Swimsuit season!). Thanks to today’s best self-tanning formulas, getting a believable beachy glow is easier than ever. To make sure you get the best results, our self-tanning pros created this guide to a fail proof sunless tan. Their secrets will get you ready for a perfect bronze glow!
Step 1: Choose a Skin-Friendly Self-Tanner
Do your skin a favour and use a non-sensitising, fragrance-free self-tanner formula. Many self-tanners contain skin-aggravating fragrance and high concentrations of alcohol, which make skin look worse over the long haul—eek!
Step 2: Prep Skin for a Smooth Self-Tan
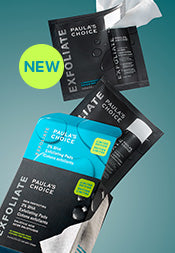
Exfoliate. Self-tanner saturates more intensely in dry areas of built-up dead skin, especially on the knees, ankles, feet, elbows, and neck. Use a leave-on AHA or BHA exfoliant for super silky smooth even skin every day.
Shave your legs the day before. When you shave directly before applying self-tanner, the formula can end up accumulating in the follicles of the freshly shaved hairs, resulting in tiny specs of darker colour. Shaving a day in advance helps alleviate this issue.
On the flipside, you also want to avoid shaving right after applying self-tanner. Shaving naturally exfoliates the surface of skin, which will take some of your faux tan with it.
Step 3: The Best Way to Apply Self-Tanner
Have a game plan in mind. Think of your body as a map. Generally, starting at your feet and ankles works well, but it doesn’t really matter. The most important thing is to know what areas you’ve covered, how much to apply over each area, and avoid overdoing it.
Start with clean skin and selectively moisturise dry areas only. This helps prevent the drier areas from soaking up more self-tanner than the rest of your body.
Apply self-tanner in a way that mimics a real tan. Certain areas of the body rarely see the sun (like the insides of arms) and so they naturally look lighter when you get a suntan. You can imitate that by mixing self-tanner with lotion, and applying a layer of this diluted mix in these areas for a more believable faux glow.
Wash your hands every few minutes during application. It sounds time-consuming, but waiting longer than that can result in orange palms and cuticles. When you’re done, use makeup remover between your fingers, toes, and around your nails to make sure you’ve eliminated self-tanner buildup in those areas.
Stay dry for six hours or more to be sure the self-tanner has time to work. That means no showers, hot yoga, or dips in the pool. If you can go longer, even better.
A Few Words of Caution!
Self-tanner does not protect you in any way from sun damage. You still need to wear ample sunscreen and avoid getting tan from the sun or, even worse, from tanning beds.
Be sure the self-tanner is set and dry before putting clothing on. Otherwise, the self-tanner may transfer, which can stain clothing or bedding.
Be patient as you learn the techniques. If you make a mistake, you can even it out by adding a bit more in some areas or by lightening streaky areas with exfoliation. Our best advice is to go slowly, the results will show for themselves—a safe, sun-kissed looking glow!


